What Linocut Is
Linocut is a form of relief printing in which areas of a linoleum surface are removed with cutting tools, leaving a raised design that is inked and pressed onto paper or fabric. The uncut surface transfers ink; the cut areas remain white in the final print. It is one of the more accessible relief printmaking methods because linoleum is softer and more uniform than wood, does not have grain direction, and does not require specialised woodworking tools.
Linocut can produce bold graphic results with relatively simple tools, but finer detail work demands consistent cutting technique and a good understanding of how the material responds to different tool profiles. This guide covers the complete process from preparing the linoleum to pulling edition prints.
Materials Required
- Linoleum sheet or mounted lino block — grey battleship lino (approx. 3.2 mm thick) or tan lino on jute backing
- Lino carving tools: V-tool (60° and 45°), U-gouge (small, medium, large), bench knife
- Oil-based or water-based relief printing ink
- Brayer (rubber ink roller), approximately 10 cm wide
- Inking slab (glass or acrylic, minimum A4 size)
- Printing paper — dampened for best ink transfer (dampening optional for machine-made papers)
- Baren or printmaking press
- Carbon paper or transfer paper for design transfer
- Pencil, ballpoint pen, and masking tape
Selecting Linoleum
Two grades are widely available in Poland: traditional grey battleship linoleum (also called flooring lino) and cream or tan lino on a hessian backing sold specifically for printmaking. Grey battleship lino is harder and more brittle when cold; it should be warmed before carving (placing it on a warm radiator for several minutes is sufficient). Tan printmaking lino is softer throughout and easier to work in all temperatures.
Avoid thin vinyl flooring products sometimes sold as "lino substitutes" — they do not take ink the same way and the surface degrades unevenly under a roller. True linoleum is made from linseed oil, cork powder, and resin on a fabric backing.
Transferring the Design
Prepare the Design
Draw or print the design at the finished size. Remember that the print will be a mirror image of the block — any text or directionally asymmetric element must be drawn in reverse before transferring. Use a photocopy or laser print reversed in image-editing software, or draw directly in reverse on the lino with pencil.
Transfer to Linoleum
Place carbon paper face-down on the lino surface. Place the design on top and tape it in position. Trace firmly over all lines with a ballpoint pen. Lift the paper and check the transfer is complete before removing it. If the transferred lines are faint, go over them lightly with a soft pencil before cutting.
Alternative Transfer Methods
A laser toner transfer can be used by printing the reversed design on a laser printer and pressing the toner face-down onto slightly dampened lino with a hot iron. The toner bonds to the surface and provides clear, stable cutting guides. This method leaves a slight residue but works well for complex linear designs.
Carving the Block
Tool Selection and Cutting Order
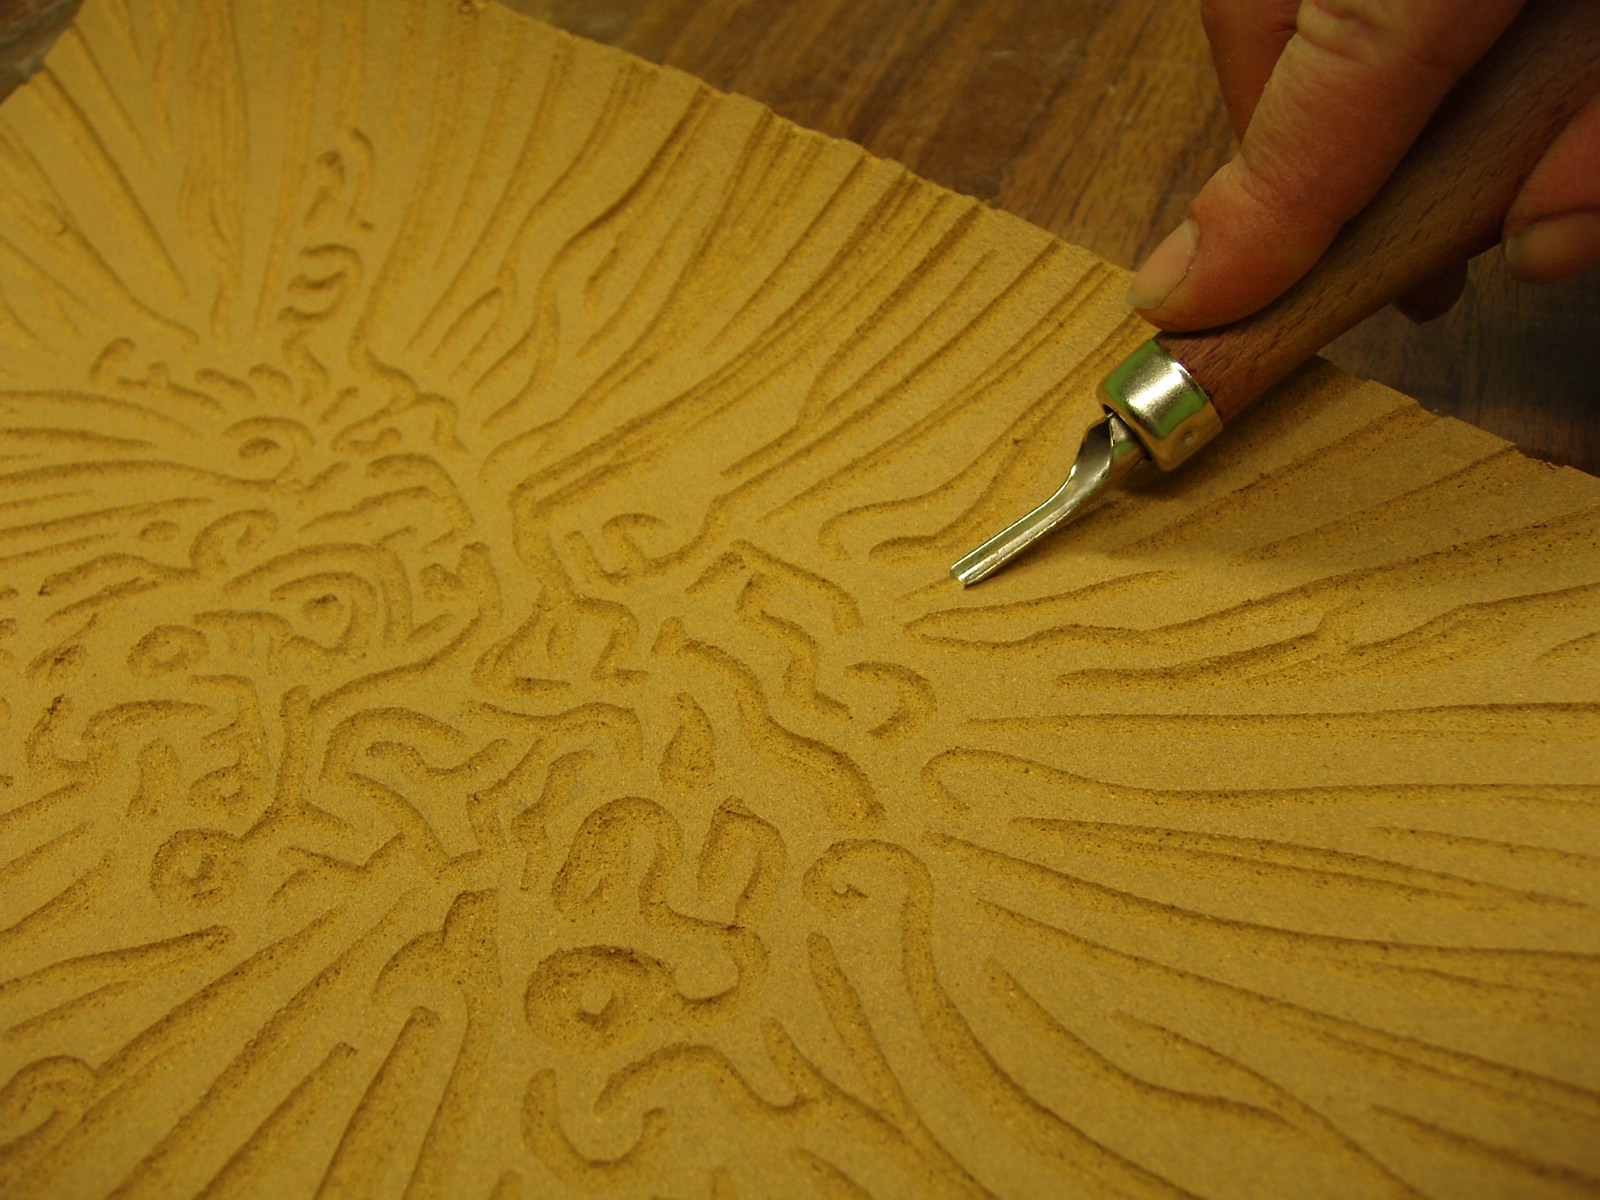
Begin with a fine V-tool to outline areas that will remain as raised printing surfaces. Work from fine detail to broad areas. Use a small U-gouge to clear the area immediately adjacent to fine lines, then larger U-gouges to remove broad background areas. Always cut away from the body and keep fingers behind the cutting edge. Secure the block with a bench hook if working without a press fixture.
Depth and Wall Angle
The cut depth affects how cleanly the edge prints. Vertical walls — made by a V-tool entering and exiting steeply — produce sharp edges in the print. Undercut walls (where the base of the cut is wider than the surface opening) cause paper to catch on the edge and pull ink into cleared areas. Aim for walls that angle slightly away from the printing surface at 70–80° from horizontal.
Checking the Block
Take proof prints frequently while carving, especially before removing large areas. A proof print shows exactly what the block will print and reveals tool marks, missed areas, and any design adjustments required. Rub the inked block lightly with tissue before proofing to remove excess ink from cut grooves, which can fill with ink and print as grey rather than white.
Inking
Preparing the Ink
Place a small amount of ink on the inking slab — for a 15 × 20 cm block, a roughly 2 cm line of ink from the tube is a starting point. Roll the brayer across the ink until the roller is evenly coated with a thin, tacky film. The ink should make a slight hissing sound as the brayer rolls; if it is silent, the ink layer is too heavy. If the brayer skips, the ink is too stiff — add a small amount of tack reducer or petroleum jelly.
Applying Ink to the Block
Roll the brayer across the raised surface of the block in multiple directions to ensure even coverage. Inspect the surface in raking light — all raised areas should appear uniformly coated with no thick edges (which indicate over-inking). Re-roll once or twice with a lightly loaded brayer if any areas show pooling.
Printing
Hand Printing with a Baren
Position the paper on the block using corner guides or registration marks. Lower the paper carefully to avoid smudging before full contact. Press the baren in overlapping circular motions across the back of the paper, applying firm, even pressure. Lift one corner of the paper to check ink transfer without disturbing registration. Complete additional passes over areas that appear under-inked, then peel the paper back from one corner in a single steady motion.
Printing with a Relief Press
Set roller pressure so the block surface is just contacted by the cylinder at its lowest point. Over-pressure crushes the relief edges and fills in fine detail; under-pressure results in missed areas. Run a proof through the press, inspect, and adjust pressure in small increments. Most desktop relief presses (such as the Albion or Columbian pattern) use adjustable platen depth screws or roller gap controls.
Multi-Colour Linocut
Two approaches exist for colour work. The reduction method uses a single block: print the lightest colour first, then cut away what should remain that colour before printing the next darker colour on top. This is destructive — the block cannot be returned to its earlier state. Separate-block registration uses one block per colour. Sheets are passed through registration on each block in sequence.
For registration in Poland, most printmakers use corner tab registration boards or the bar-and-pin system. The latter requires pre-punched paper and registration bars fixed to the press bed, and is standard in production-level relief printing.
Paper Selection
Japanese papers (kozo, mulberry) are highly absorbent and require minimal dampening. European mould-made printmaking papers such as Fabriano Rosaspina or Hahnemühle Copperplate give reliable results with oil-based inks. Machine-made papers work for water-based inks but show show less ink depth. Dampening paper by lightly misting and stacking between damp newsprint sheets for several hours before printing improves ink transfer uniformity on heavier papers.
References
- Westley, Ann. Relief Printmaking. A&C Black, 2001.
- Wikipedia contributors. Linocut. Wikipedia, The Free Encyclopedia.
- Tate Gallery. Linocut — Art Term. Tate.org.uk.